EA 16 Inch Bottom Plow
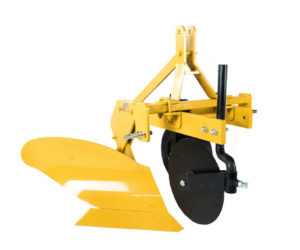
The Everything Attachments 16″ Single Bottom Plow is designed and manufactured right here in Newton, NC, and has one job, to turn your dirt over. This plow turns dirt over recycling the vegetation as food for your crops, and keeps your garden easy to till.
❤ 0 saves View Price
How To Plow A Garden
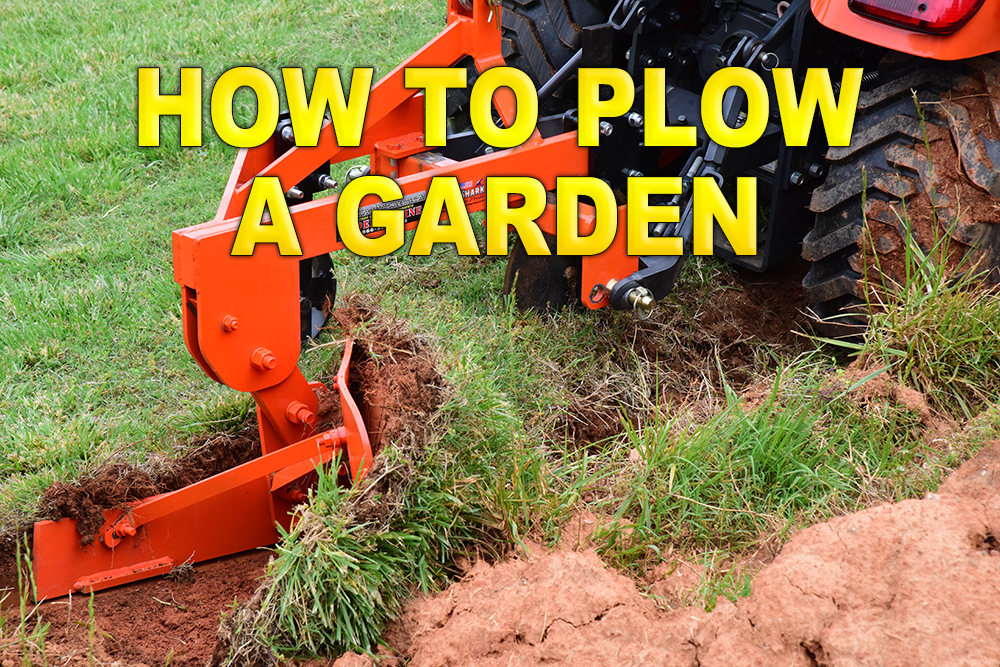
I’ve decided to create a How To category and figured I’d start off with “How To Plow A Garden”. Of course there are a number of ways to plow a garden but being that this is a Tractor blog we will be focusing on the method that requires one. Obviously you’ll need a plow attachment as well and I’d recommend one that’s sized to match your tractor. The 14 Inch Single Bottom Plow is a pretty popular plow, if you have a mid size tractor. Why do we need to plow a garden in fhe first place? Plowing for the most part to prepare soil for planting crops. Just throwing down crop seeds on the ground wouldn’t do much for your garden. Crop seeds need water and nutrients from the ground. Being buried also protects them from being eaten by the birds. With that said lets get started.
Five Steps On How To Plow A Garden
Okay so this is our method and it’s only to be use as a guideline. Depending on where you live and the time of year there may be better ways to plow but in general this is a good starting point. If you have any questions or anything you would like to add please do so below.
Step One – Plan Ahead
For the first step in How To Plow A Garden is to plan ahead. The best time to plow is normally at the beginning of the growing season of which ever crop you are growing. If this is the first time the land has be plowed you may want to leave yourself some extra time in case you need to make a second or third pass. For those smaller tractors plowing to a desired depth in hard and packed soil may be difficult. Also it’s always a good idea to inspect your equipment before starting any job and make sure everything is in working order.
Step Two – Inspect The Area
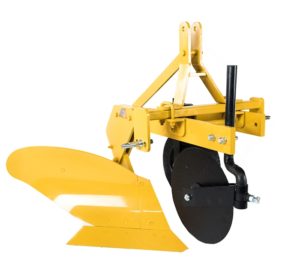 The Second step to plowing or preparing to plow is to inspect the area that you plan on plowing for large obstacles. I know it seems like common sense but it’s often overlooked. Large tree limbs or rocks should be removed before plowing and for those that can’t be removed should be clearly marked. Those extra 10 to 15 minutes of inspecting and clearing can save you hundreds of dollars. A lot of time and money can be wasted if a limb damages your tractor or a large rock breaks your plow.
Its also a good idea to mow down any tall grass or vegetation to help prevent clogging up the equipment. Cut weeds and grass is much easier for plows to manage and mix into the soil as the plow turns over the dirt.
Step Three – Pick A Direction
Picking a direction is again another one of those common sense things for most but for those that may not know or just want assurance you should always plow in the direction of the long sides of the garden for efficiency. By plowing in the direction of the long sides you will be cutting down your turn-around times and you should always plow in the same direction. You will also want to make sure you don’t get to close to a tree line and get snagged on a root or end up plowing up your neighbors land.
Step Four – Make Your First Furrow
After you know the direction you plan to plow, check the plow adjustments and proceed in making your first path also known as a Furrow. When plowing with a plow you want to try and get the sheer blade level so that your plow don’t keep wanting to dig deeper and deeper. The depth you set your plow should be based on the type of crop you are trying to plan. In general, a seed’s planting depth is approximately two to three times its diameter size however to be on the safe side check the seeds planting instructions.
Step Five – Double Check The Depth
Once you have made that first furrow you should double check the depth and make sure you plow isn’t set to deep or is deep enough. If you are satisfied with the depth or have made the adjustments then place the tractor wheels that are on the same side as your moldboard in the first furrow. This is to ensure that the dirt from the second furrow is flipped over onto the first furrow. Continue with each row till your garden is plowed.
How To Plow With A Single Bottom Plow Plow
Check out this video where Ted goes into detail how to plow using a Single Bottom Plow attached by a 3 point hitch.
How Do You Plow
I’m sure a lot of people have their own method and depending on where you live and the season at which you plow you should. Even if you follow this guideline you’ll end up finding a modified version of your own that works for you. Please give me some feed back and share with us how you plow your garden.
❤ 5 saves View Price
Cultivator VS Garden Bedder
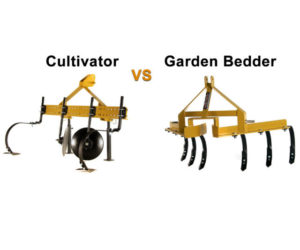
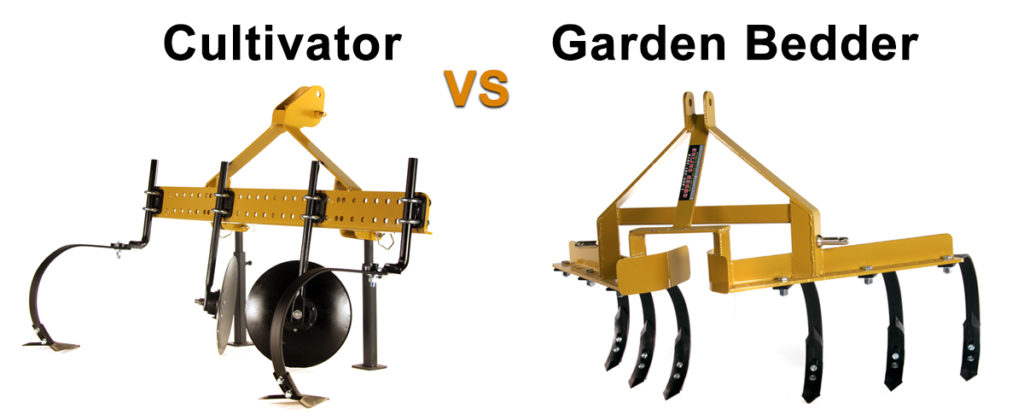
Cultivators
What is a Cultivator? Lets start off by explaining what a cultivator is and why you would want to use one. Cultivators are basically a device that loosens up soil in preparation of planting seeds. 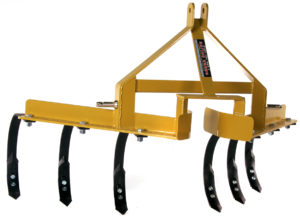 While cultivators may come in a few different forms such as a walk-behind or a pull-behind and for this article we’ll stick with the attachment kind that you pull behind a tractor. When preparing land for a garden you want to make sure the soil is loose and easy to manage. By loosening up the soil you allow more air, water, and nutrients to reach deeper in the ground which is perfect for seed growth. Digging up weeds that take away soil nutrients from crops is another benefit of using cultivators.
Cultivators are simple yet effective as there’s not much to them and they are easy to use. Most cultivator designs are similar and sort of a V-shape pattern with C-shaped tines. You can also find some with a straight bar design as well. If you have hard compact soil the V-shaped might offer a little more stability and strength however the tines are just as important. As you can see on Everything Attachments Single Row Cultivator they use Steel Spring c-tines with high carbon points. The Steel Spring c-tines allows the tines more flexibility and helps to prevent breaks and bending.
Garden Bedders
What is a Garden Bedder also known as Garden Hiller? Now that we got an idea of what cultivators are lets take a look at Garden Bedders. The main purpose of a garden bedder is to create seed beds for planting seeds. Like the Cultivators the Garden betters have a simple design consisting of a steel beam welded onto a 3 point hitch as you can see on the GB50 by Everything Attachment. 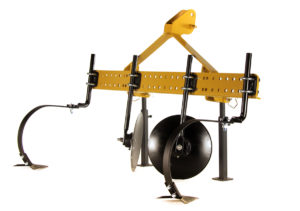 The steel beam which can come in a few different sizes ranging from 48″ to 69″ in width each with multiple sets of attachment holes. The attachment holes can be used to adjust the spacing of the discs and tines to create the desired hill/seedbed.
The two angled 14 inch discs create perfect seed hills while the two outside c-tines with shovel points help dig up old roots and weeds. Heat treated blades that are bolt-on for easy replacement. The dics or hillers use heavy duty ball bearings, a 3/4″ arbor bolt, and have two sealed bearings to keep the dirt out.
Cultivators VS Garden Bedders
Okay so now we know a little bit about both the cultivators and the garden bedders why choose one over the other? While they both work well together if you had to choose one I would think it would be the garden bedder. Technically the garden bedder is a cultivator too and has an advantage over other cultivators as it can cultivate and make seedbeds at the same time. Yes you should really cultivate before using a garden bedder but if you strapped for time and cash then a garden bedder would be a better choice. With that being said if your ground is hard and solid you really need to use a cultivator first or risk damaging your garden bedder. If money isn’t holding you back then you could also consider a Rotary Tiller which would do a better tilling job than both the cultivator and garden bedder. Just remember after tilling you would still want to use the bedder to make those seedbeds!
What are your thoughts? Which do you consider to be more valuable or the go-to attachment?
❤ 7 saves View Price


